

Setting Up Your POP or IMAP Email Address in Microsoft Outlook 2010
Setting up your cloud email in Outlook is pretty straight forward, however in order to make the process streamlined make sure you have purchased a Cloud hosting plan, have created an email account and have all email software information readily available.
The guide follows settings for a POP configuration which is the most common type of email setup, however if your interested in using an IMAP setup please follow the guide, but refer to the table at the bottom of this article for settings pertaining to IMAP.
Throughout this guide you will see 'yourname@yourdomain.com' . Replace this with your email address.
Adding your email account to Outlook 2010
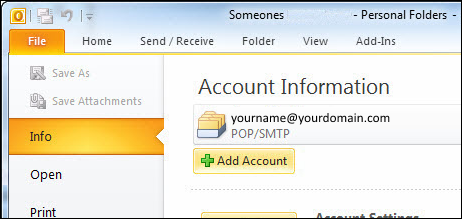
1. Open Microsoft Outlook 20102. Click on the File tab in the top left hand corner
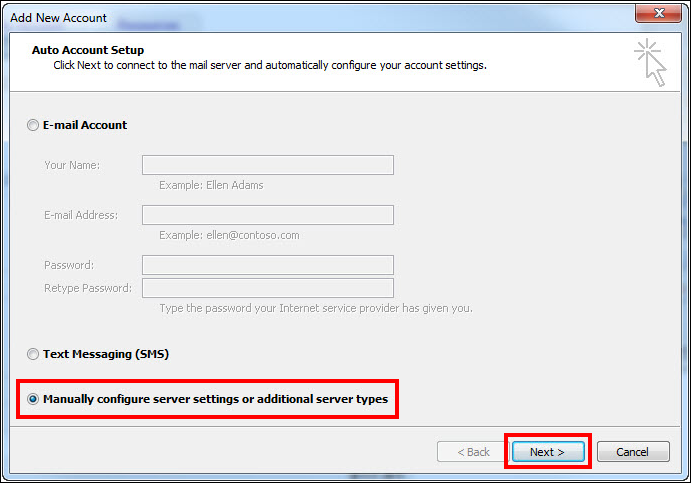
4. Select the radio button 'Manually configure server settings or additional server types' Click Next
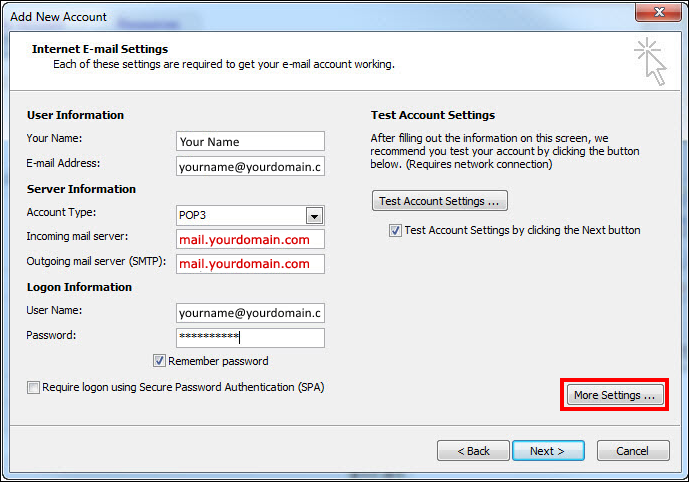
Here a new dialog window labeled Internet Email Settings will open. We'll need to fill out each field in order to get our Cloud email up and running.
Email Settings + Server Information in Outlook 2010User Information
- Your Name: Simply enter the name you wish to be displayed as, commonly this will be your first and last name.
- E-mail Address: Enter your full email address. (e.g yourname@yourdomain.com)
Server Information
- Account Type: Select POP3
- Incoming Mail Server: mail.yourdomain.com*
- Outgoing mail server (SMTP): mail.yourdomain.com*
*leave the prefixes mail , only replace yourdomain.com
Logon Information:
- Username: This will be your full email address. (e.g yourname@yourdomain.com)
- Password: This will be the password you specified upon mailbox creation. Ensure that the 'Remember Password' checkbox is ticked.
2. Click on the Outgoing Server tab
3. Tick the checkbox My outgoing server (SMTP) requires authentication. This will automatically highlight Use same settings as my incoming mail server leave this selected.
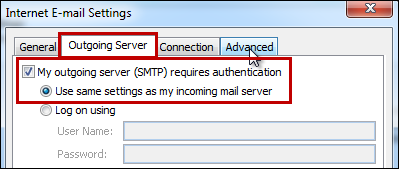
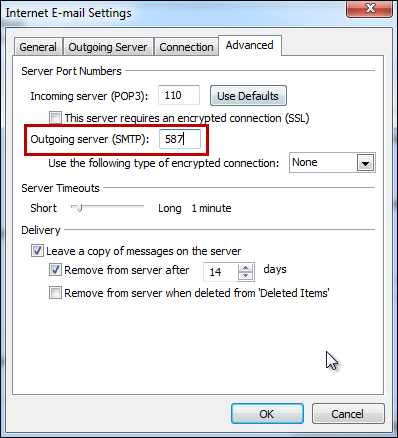
5. Change the Outgoing server (SMTP) port to 587
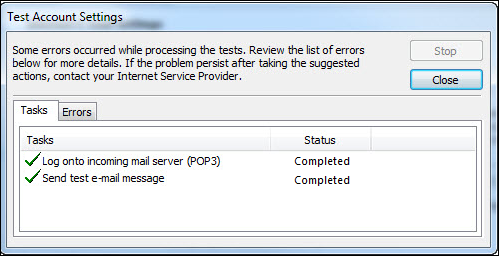
You can now either click Test Account Settings... or Next >. It's a good idea to test your account settings to see if your email is working. If your email account is configured correctly you will get two green ticks confirming sending and receiving emails are working.
Your Jolis International email is now setup in your Outlook. If your unsure of some settings or wish to use IMAP please refer to this table for a list of our full email settings.
| Settings | Information | Example |
| Your Name | Your name as you wish it to appear for your recipients. | Your Name |
| Email Address | Your full email address. | yourname@yourdomain.com |
| Incoming mail server | If you are using POP (most people will) use pop.example however if using IMAP please use imap.yourdomain.com | POP mail.yourdomain.com IMAP mail.yourdomain.com |
| Outgoing mail server (SMTP) | Enter our outgoing mail server. Please note that if you wish to send through our SMTP server it does require authentication.. | mail.yourdomain.com |
| User Name | Your full email address | yourname@yourdomain.com |
| Password | Your mailbox password | *************** |
| Incoming Port | For POP the default port is 110 , however if using SSL the port is 995. For IMAP the default port is 143, however if using SSL the port is 993. |
POP IMAP |
| Outgoing Port | Most ISP's tend to block port 25, so we recommend you use 587. | Non SSL = 587 SSL = 465 |

